This is an instruction on how to create a no-sew tote bag from cereal bag. For variation, you can use coffee bag or chip bag or pet food bag or other similar bags to make it. // Artikel kali ini tentang cara membuat tas jinjing dari kantong (bekas) sereal tanpa perlu menjahit! Untuk variasi, bisa juga menggunakan kantong atau bungkus bekas kopi, bungkus keripik, kantong makanan hewan dan sejenisnya.
Before I start, I'd like to apologize for the poor quality of the pictures I use here. // Sebelum aku mulai, maafkan soal kualitas foto-foto yang digunakan di sini :(
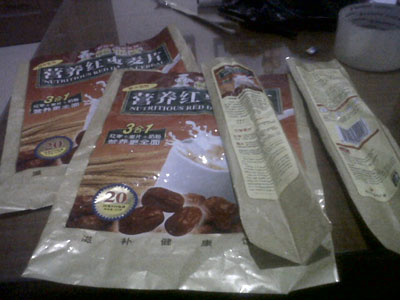
Materials:
- Cereal bag // Kantong sereal
- Clear tape // isolasi bening
- Duct tape (though it's red, but I use gray for this tutorial) // Plakban
- Cutter or Xacto knife // Cutter atau silet
- Scissors // Gunting
- Ruler // Penggaris
* Note: please ignore the stapler in the picture :p // Catatan: tolong abaikan stapler dalam gambar :p
The steps: // Langkah-langkah:
1. Cut the bottom piece of the cereal bag. // Potong bagian bawah kantong sereal.
Then cut the bag into 4 pieces in accordance to its creases. Now you have 2 big pieces for the front and back, and 2 smaller pieces for both sides. // Lalu potong kantong tersebut menjadi 4 bagian, 2 bagian besar untuk depan dan belakang, serta 2 bagian lebih kecil untuk sisi kiri dan kanan.

2. Cover those 4 pieces with clear tape. Cover them on both sides (the right side with picture & the wrong -silver- side). This step will make your bag sturdy, durable and waterproof. When covering with clear tape, you may develop air bubbles. Don't worry. Use the ruler tip to press and push them out. If you create wrinkles when covering, peel the tape off of the bag piece, smooth it out and cover it again. // Lapisi semua 4 bagian dengan isolasi bening. Lapisi bolak-balik (yang bergambar dan yang berwarna perak). Langkah ini membuat tas kuat, tahan lama dan anti air. Ketika melapisi dengan isolasi, mungkin akan tercipta gelembung udara. Jangan cemas. Gunakan ujung penggaris untuk mengeluarkannya. Bila dalam pelapisan terjadi kekusutan, lepaskan isolasinya dari bagian kantong, luruskan dan tempelkan kembali.

When you reach the end of the bag piece, don't cut off the tape but fold it over. // Ketika kamu mencapai bagian akhir bagian kantong, jangan gunting sisa isolasinya tapi lipat ke sisi baliknya.
3. Trim all the rough edges. Make sure the dimensions of both big pieces and both smaller pieces are the same. Crease the bottom part of all 4 pieces. Use the ruler to help crease it. This step makes the bottom part of the tote bag. // Rapikan sisi-sisi yang tak beraturan. Pastikan ukuran kedua bagian besar dan kedua bagian kecil sama persis. Lipat bagian bawah dari 4 bagian kantong tersebut. Gunakan penggaris untuk mempertegas lipatan. Langkah ini untuk membuat alas tas.
4. Assemble all the pieces like the picture below. Use clear tape to do so. // Susun semua bagian seperti dalam gambar. Gunakan isolasi bening.
Flip it over and use clear tape to enforce the bottom part. // Balik dan gunakan isolasi bening untuk memperkuat bagian tersebut.
5. Rip your duct tape (mine is gray) in accordance to your bag's height. Put it on one side of the big piece and attach it onto another side of a smaller piece. See picture for better understanding. // Ambil plakban (punyaku abu-abu) dan perkirakan panjangnya sesuai dengan tinggi tas. Rekatkan pada salah satu sisi bagian besar seperti dalam gambar dan sambung dengan dengan sisi lain dari bagian kecil. Lihat gambar untuk lebih jelasnya.
Do it for all other 3 sides until you have the basic bag. // Lakukan pada sisi-sisi lainnya sampai semuanya menyambung seperti tas.
6. On the top side, use the same color duct tape (or use other color to enhance the look). This will act as a hem. Pada sisi atas tas, rekatkan plakban warna sama (atau bisa pakai warna lain untuk mempercantik tampilan). Plakban ini berfungsi sebagai kelim tas atau penghias.
7. Attach the handles. You can make the handles from duct tape or from similar cereal bag. // Pasang pegangan tas. Pegangan tas ini bisa dibuat dari plakban atau dari bahan kantong bekas yang sama.